Crystal Madrilejos

Design & Creative

tunictop2

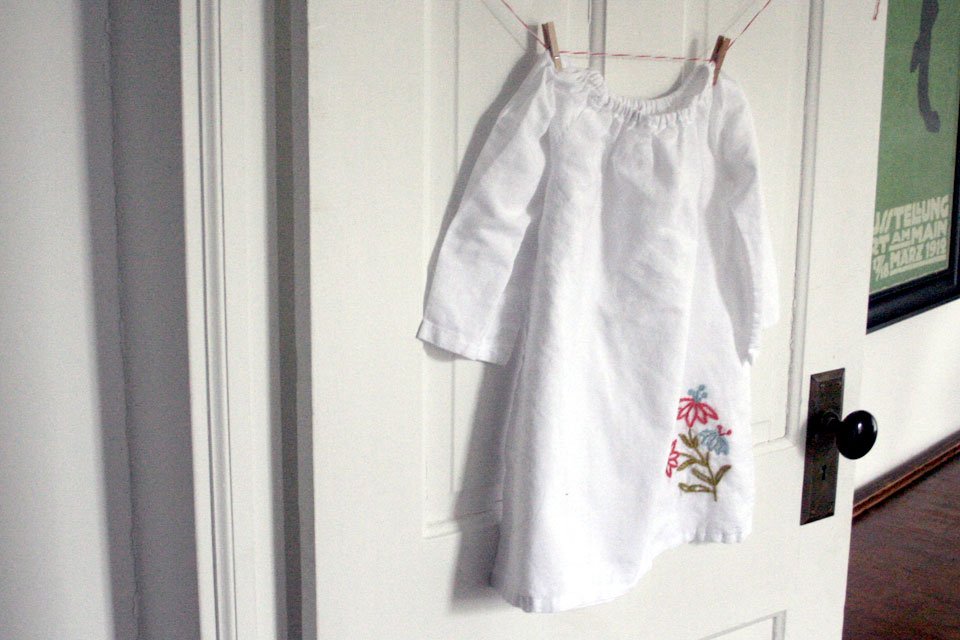
I mentioned that I’m a bit of a crazy when it comes to gifts, I prefer to make them if I am able. This past Christmas was no exception. I made this linen tunic for my niece Layla , who will be turning five in a few months. I’ve really been into linen lately and wanted to give this style of shirt/dress/tunic a try in hopes to eventually make more for Ellis and, one day, myself.

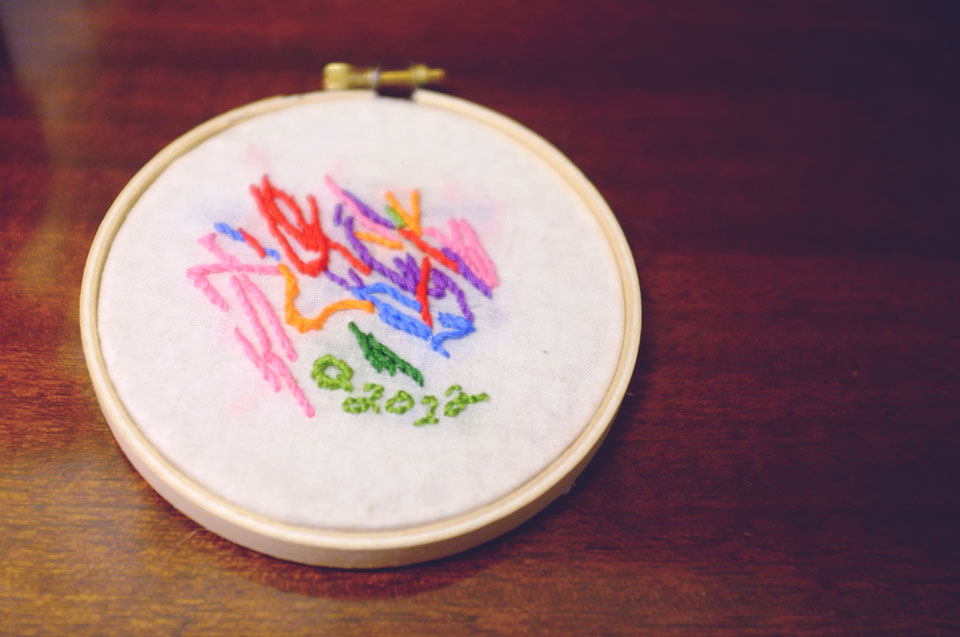
I haven’t made too many wearables other than crochet or knit things. Sewing isn’t my specialty. I’ve never taken a sewing class and a lot of times I’m just winging it as I go and always present it with the caveat of: don’t look too closely. I know the basics and I can follow instructions, that’s about my level of expertise in the matter. I also don’t sew with knits if I can avoid it. Not for lack of desire, but the whole stretchiness thing throws me for a loop. But I’m happy with how these turned out. The embroidery was also a new adventure for me too. I’ve embroidered before, but not on clothing and nothing so complicated, but all-in-all, it was a success. (more…)

embroideredart2012

We love encouraging our kids to be creative, especially when it comes to gifts. They are still so young so many of these gifts are collaborations between parents and kids, which I love! One day, they won’t need my help. But I’m hoping they will still want it!

Quil draws or paints almost every day, so we always have a ton of paper with drawing and marks on them. So, I decided to take it up a notch and create something special together by helping him turn a drawing into an embroidered piece of art. The picture above is what we made for Quil’s Grammy last Christmas. Excuse the terrible embroidered text on there that is supposed to say “Q 2012” but looks more like “2022” ha!

Mind you, this is not a completely novel idea. Just search “Embroidered Kid Art” on Google and you will come up with endless posts. A lot of them involve transferring from paper to fabric, but I just had Quil draw directly onto the fabric. Maybe if your kid is older and makes really detailed and clearly representational images, it would be best to start with paper so they have more control, but Quil is still in the scribble phase, so directly on the fabric works for us. Or if you have an image they already created and love and think is worthy of saving in embroidered form, transfer is obviously the way to go.

Color, line and shape were the things I followed when embroidering over his marks. It’s a simple concept, but we learned a thing or two after our first try. (more…)

As promised, I whipped up this tutorial for the ponchos I posted about a couple weeks ago. This is my first tutorial, so bear with me. Writing tutorials is hard work. Especially when I could only work on it for mere minutes at a time. I’m hoping that I don’t confuse anyone with my directions.

Granny Square Poncho Tutorial
Materials: Yarn, Crochet hook, embroidery needle and safety pins
Step 1: Crochet four Granny Squares of equal size. If you aren’t familiar with how a Granny Square is made, read Purl Bee’s tutorial on the Classic Granny Square Pattern.

The size of the poncho is going to depend on the size Granny Square you make. The diagonal measurement of the square equals the length of the poncho from neck opening to the bottom of the poncho point, like so:

Step 2: When you’ve completed your squares (i’m sure they look lovely), arrange the squares according to this diagram and attach edges together using safety pins.

Step 3: Using an embroidery needle and yarn, begin sewing together sides. Remove safety pins as you go.

(Optional) Step 4: To create a smaller neck opening or to build up a little bit of a cowl neckline: Single crochet around the neck opening to the desired height. Done!

If you have any questions, feel free to comment of email me directly. I’m not sure such a simple project warranted such a lengthy explanation, but oh well! You’re welcome! :)

I also spent some minutes putting together a printable version of this tutorial, you know, just in case you’re like me and have binders full of project ideas that I never get around to doing. (Though, I really hope you try this one and tell me how it goes. Oh! And send pictures of your creations too!)

Download the Granny Square Poncho Tutorial here.

Enjoy!
– c.

P.S. Just one last thing before I let you get crafting, this pattern is for personal use only. Please don’t sell this pattern or any project made from this pattern. Feel free to share this and make as many as you please for everyone you know, BUT please please don’t sell them.  Thank you!


Remember this guy?

In the months before Q was born, both Andrew and I had a surge of productivity. I think it was our collective subconscious preparing us for a drought. We’ve been fortunate that Q is a good sleeper now. After his bedtime and before he wakes is our free time and both Andrew and I have been able to work on some new projects.

I figured an update is in order for the projects that we worked on before Q arrived.

I should preface this update with the fact that the majority of the time Q wears Fuzzi Bunz cloth pocket diapers. We were lucky enough to have generous family and friends who bought us these fancy pants (since they can be on the pricey side).

In making the wool diaper covers I was preparing for the possibility that we might not be gifted any fancy diapers. In that case we would have to use the more cost friendly pre-fold cloth diapers that require a water resistant covering. There have been times when we ran out of the pocket diapers and had to use the pre-folds as a back up. Despite my initial skepticism, the wool covers work unbelievably well. The amazing thing about wool is that it repels water and absorbs moisture at the same time! If you want to read more about the wonders of wool, you can read more here.

Here is Q sporting a pair of diaper covers made from a repurposed wool sweater that I felted in the washing machine:

The crocheted cover and the knitted cover were also a success! The crocheted ones are still a bit large, but he’s already outgrown the Vanilla cover, so I’m in the process of knitting a larger size.

-c.

As Crystal mentioned in the previous post, the basic idea was adapted from the “Culla Belly” design. The main difference is the overall height of the co-sleeper. If you notice in the picture of the “Culla Belly” co-sleeper, the mattress it’s designed for is exceptionally thin. Ours is a “normal” mattress and is much thicker so the sides of the co-sleeper had to be a lot taller.

In essence, it’s a three-sided box with a “shelf” halfway up where the baby lies. The whole thing is attached to a frame underneath that extends far under the mattress keeping it in place. It’s quite secure but just for added strength we bolted it to the pallets that our bed sits on.

I did a lot of research on the toxicity of different types of wood and decided to use Poplar. Pretty much all of the basic wood types you would find at a lumber yard are perfectly safe, with the most common irritant being the dust produced from cutting and sanding. I’m also using Poplar for the crib, which is currently under construction. It’s a nice, easy to find, and not too expensive hardwood.

A lot of cribs these days are made out of different types of plywood and even MDF, which contain all sorts of industrial glues and even formaldehyde, so I knew I wanted to avoid those at all cost.

The next consideration was how to finish the co-sleeper. I decided to make my own finish instead of worrying about paints and stains and any kind of hard finish. To make the finish I heated up mineral oil – which is used on cutting boards and wooden utensils and is essentially unscented baby oil – and added some fragrance-free beeswax until it melted. (I bought the beeswax at A.I. Root here in town. Did you know that Medina, OH is The Bee Capital of the World? Well, you do now.) Then you let it cool and you rub on the paste that results (below). It’s completely food-safe and non-toxic.

My only worry in all of this is that Crystal’s not going to want to give up her new bedside space. (She’s currently using the co-sleeper as a side table and keeps her contacts, alarm clock, books, glasses, yarn, water bottle, tissues, hair ties, crocheting/knitting needles, and whatever else she manages to take to bed with her.)

-a.

Uncategorized

Co-Sleeper

A lot of the projects that we post on here are either made by myself or by Andrew but this project was a cooperative effort between the two of us: a co-sleeper for the baby.

We decided to go the co-sleeper route for the first few months while I’m on maternity leave. If you’re unfamiliar with what a co-sleeper is, you can learn more here. It is basically a 3-sided bassinet that attaches to the side of the bed. They come in all different types and sizes. Since I will be nursing, we figured it would be easier to have the baby there next to me rather than me getting out of bed every two hours to go into the other room. BUT at the same time, not have the baby IN the bed with us.

Most co-sleepers on the market are big bulky things that involve many parts and can convert into other things like a free standing crib or a playpen. We wanted something really simple made from basic materials. With inspiration from this “Culla Belly” prototype we saw on swissmiss we made our own version.

I’ll let Andrew embellish more on the actual construction since he was responsible for that part. The parts I was responsible for were the wool felted sides, the mattress, and the mattress cover. Remember way back when I posted about making big pieces of felted alpaca wool? Well, this is what those were for. We knew we wanted felt sides but didn’t want to throw down the cash for industrial wool that would hold its shape on its own. So we improvised.

Here are the sides: They are made from are felt sewn around pieces of heavy cardboard and then sewn together.

The mattress: I sewed together remnants from the sides and layered them between two pieces of the alpaca felt.

The mattress cover: I crocheted a wool mattress cover just in case the baby springs a leak. I doubled the yarn while crocheting to make sure it was nice and dense (I used Lion’s Brand Fisherman’s Wool in Nature’s Brown) then felted it in the washing machine. If baby has an accident I can just throw the cover in the wash and not worry about washing the whole mattress.

Currently, I’m working on making little sheets but right now we just used a pillow case that fits surprisingly well. Check back soon for a post from Andrew on the construction.

–c.

My 5-year old nephew Falcon and my 2-year old niece Arwen are both obsessed with superheroes. So this Christmas I decided to make them their own superhero capes. My brother-in-law has nicknames for them; Falcon is Manboy and Arwen is Peanut. Turns out that these nicknames also work out to be pretty appropriate superhero names too!

I came up with a logo for each of them. Peanut was pretty simple and straight forward, but Manboy was a little more of a challenge. In the end, I think they both worked out well. I designed them on the computer then printed the patterns onto Heat n Bond Iron-on Adhesive paper. I ironed the pattern onto pieces of felt, cut them out, adhered them to the cape, then sewed around them for reinforcement.


I looked around online for some cape pattern ideas and ended up with a fusion between this blog post and this pattern. I’m no expert seamstress so I was delightfully surprised when they turned out better than I expected.


Here is a strange action shot of the two of them with the capes on:

–c.

This past October my sister had her 4th baby, a little girl named Phoenix! For her Christmas gift I made her a little quilt, which was technically the first quilt that I have ever completed.


I started a quilt for our baby a few months back, but have yet to finish it. The one I made for Phoenix is a lot smaller than the one I’m making for our baby and it turned out to be a good learning experience. I almost tore my hair out a couple times, but overall I’m happy with how it turned out. I’m confident that I am now better equipped to handle a larger quilt next time around.

I made this quilt out of flannel and though in the pictures it looks good enough, it’s by no means perfect. Honestly, I don’t really know how to sew too well and half the time I’m just improvising as I go along. There are plenty of puckers and bunches in places, but oh well!

Here are some detail shots:


-c.

I became a fan of Jennifer Murphy the minute I set eyes on her site. She makes some of the most beautiful stuffed animals I’ve ever seen. One day I would love to own one of her pieces, but 1.) there’s no way I could afford one and 2.) they sell out super fast.

Luckily for me Jennifer teamed up Midwest of Canon Falls and licensed some of her designs for mass production. Most of the designs are now retired and no longer being produced but can still be found some places online.

I happened across this one at a local store recently. Other than the ornaments on our tree, this is our only other holiday decoration. I love it!

–c.

Uncategorized

Lady Cat Pillow

After seeing the cat pillow that I made for my co-worker’s niece, another of my co-workers requested one for her niece as well! She requested it a few months back and I hadn’t gotten around to making it until recently and I am very happy with how it turned out.

The first cat pillow was for an infant so I had to be sure everything was sewn down completely because I know babies have a tendency to tear things off and eat them! With this version, I could be a little more fancy with the details because my co-workers niece is a little bit older, beyond the eating things phase. I didn’t have to worry about all the edges being satin stitched so it was a little easier to make more complicated shapes.

I had complete creative freedom, but my co-worker’s one stipulation was it had to have a cat pattern on it somewhere. I was lucky to find this one! In case you were wondering, I’ve been using flannel, felt and polyfill for these recent pillows. But I’ve used many other fabrics in the past. I usually have a hard time coming up with ideas for the faces. There are just too many possibilities!

–c.