Crystal Madrilejos

Design & Creative

What’s new on the homestead? Harvested some ramps from a friends property (pictured above – ramps as far as the eye can see), garden is underway, pond stocking is in progress, potatoes are sprouted, the reclaimed wood for the compost bin is nail free, a couple more raised beds have been built, and deer fence is almost up. Now, we just need the weather to cooperate! It’s been up and down the past couple weeks and I guess that’s why we have “last frost dates” – but man, am I itching to just get going with the warm weather already!

Today we started putting up the new deer fencing that was my gift to myself last year when I got a bonus at work. Who buys deer fence with their bonus? I do. It’s that important to me. With our past experience, it’s just not worth it to garden in our area if you don’t have either a dog or a deer fence. We don’t want a dog, so we went with the fence. I’m really, really hoping this does the trick because I love having a garden but the stress of the deer almost makes it not worth it.

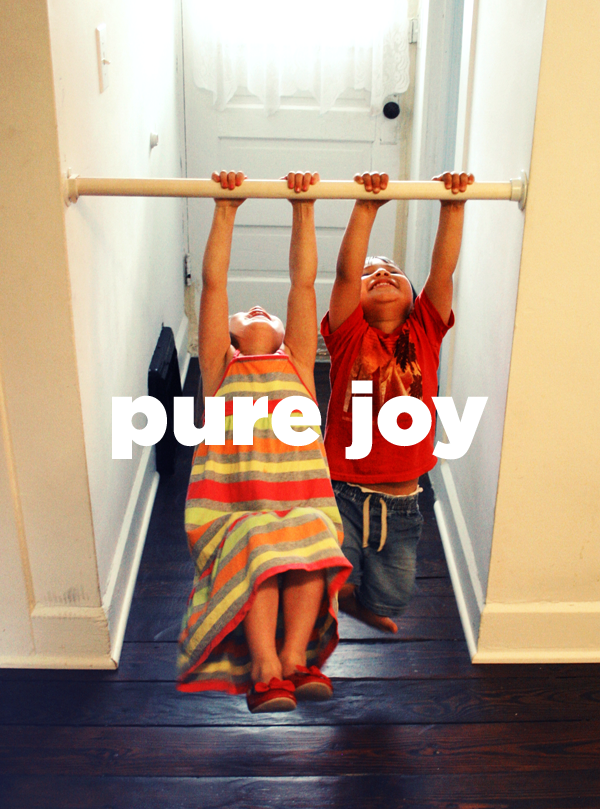
I wish I had more pictures for you from the past few weeks, but I’m too lazy to upload them right now.

So here is a picture of one of our raised beds before we installed it last fall. You can see the basic construction in this photo. The outside rails are attached to four posts that will go into the ground so the bottom board sits flush on the ground.

After installing them, we put a layer of black weed blocking fabric, followed by a few layers of cardboard, a layer of leaves, a layer of alpaca manure, then another layer of leaves. This then sat for the past six months to kill the weeds and grass and also create the nutrient rich base for a layer of composted soil that went on top last week. If you can do this in the fall, it will save you a lot of work come spring (and summer, since it will save you lots of time weeding.)

Okay, so I know some of you are wondering why we used pine when it’s going to be outside and will eventually rot. Ideally, cedar would be the wood of choice since it’s naturally rot resistant. But Cedar is many dollars. We figured if we can get a few years out of these beds before they rot, it will have been worth the price we paid for the wood. I think down the line, we’re open to trying different things. We just don’t have the money for cedar ones at this point. One bed can run upwards of $200 – which is double what we paid to make ALL our beds.

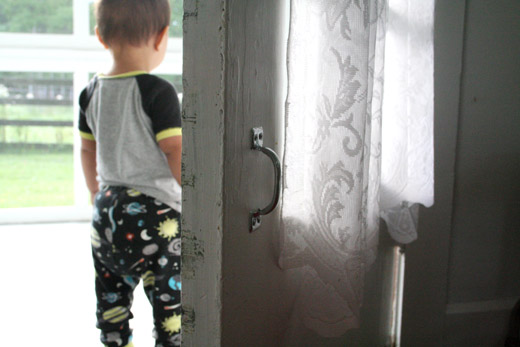
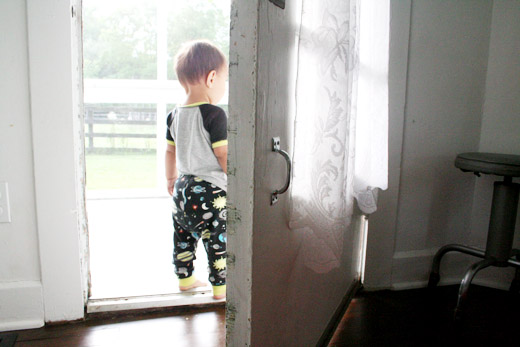
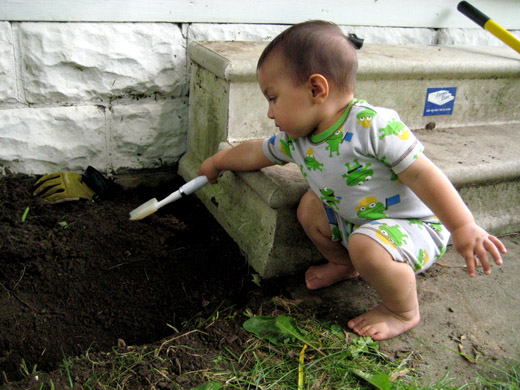
We also didn’t seal the wood. And the reason being, we don’t want any toxic materials touching the soil that will be growing the food we’ll be eating. This is also the reason we didn’t use pressure treated wood, which again is rot resistant but also treated with chemicals. Here is Quil helping Andrew with the beds last fall. And by helping I mean, running around like a maniac. I just got him during a moment of stillness in this shot.

I will post more current photos of our progress soon, I promise!

xo,
c.

I’m a working Mama. I’m also nursing a 5-month old baby, so that means I have to pump while at work. When I went back to work in November after my maternity leave, my co-workers gave me a potted Amaryllis bulb as a “Welcome Back” gift. Turns out, this is the PERFECT gift for a pumping Mama!

Pumping isn’t the most glamorous or the most fun thing to do with one’s time. It’s a lot of just sitting there (thank goodness for smart phones and this bra.) And you look and feel like a milking machine with tubes and bottles and plastic breast shields. It’s quite a sight.

However, I’m fortunate to at least have a pumping room at my office with a lot of natural light. When they gave me this potted Amaryllis bulb I decided, rather than put it at my desk, I’d put it in my pumping room. These past two months I’ve been back at work I’ve been able to watch my plant grow and it’s been absolutely fascinating, calming, and peaceful. Since Amaryllis are very fast growing it gives me something to look forward to every time I have to pump. This week, it bloomed (as you can see in the photo above.) Here is a rough time-lapse from the past two months:

This could be a great gift for a non-working Mama as well. It’s easy to care for and has a big impact when it blooms.

Any working Mama’s out there who pump during their workday? How do you pass your time while pumping?

xo,
c.

As promised, I put together the pattern for the crocheted toy bags that I’ve been making lately. This is the first pattern I’ve written, so bear with me and please let me know if you find any errors or if any of the directions are confusing. (more…)

Like most households with small children, the toy situation seems to get out of control fast. You somehow go from 0 to 1,000,000 toys in only a few short years! They multiply like a wet Mogwai and next thing you know you are constantly stepping on small sharp things and doing a monthly under-the-couch sweep of wayward balls and anything with wheels. You have entire sections of your home devoted to them and somehow they end up everywhere but there. You get so sick of putting things away that you eventually just get a huge bin that you throw everything into only to have your kid dump it out the minute you put the last toy away. Andrew said that one time he intentionally didn’t pick up after Quil just to see what the house would look like in one day. He said by mid-afternoon, it looked like someone had robbed the place. Drawers out, couch cushions overturned, cabinets open!

But one thing we learned with Quil is that he is pretty good about putting things away if each type of toy has its own container and not just one catch-all bin. We started off with just cloth bags that you sometimes get when you buy a pair of shoes. But we only had a couple of those. So I decided to start making some crocheted ones. Now he’s got bags for puzzle pieces, train sets, musical instruments, cars, and he can remember which ones go where for the most part.

Don’t get me wrong. His toys still get everywhere, but it does seem more manageable when everything has a designated bin/bag. I still need to make a few more, but these are super easy to make and work up pretty quick since I crochet three strands at once with a large hook. Check back later this week for a pattern if you are interested in making some for yourself.

***UPDATE***
The pattern is now available here.

xo,
c.

Sometimes, it’s the simple things that make kids the happiest. Awhile ago, we noticed Quil had started hanging on the edge of our kitchen table. His little fingers gripped the edge while he hung suspended in a seated position about four inches from the floor. He would swing for about five seconds before he couldn’t hold on any longer. He seemed to enjoy it so much that Andrew decided to install a swinging bar in our hallway using closet hardware and a big wooden dowel.
Our three biggest considerations were that it had to be safe, removable and simple enough that Quil could set it up himself. 
To keep it safe, we left it close enough to the ground that he if he were to slip and fall, he would still be able to land on his feet. 
Also, in our initial attempt we realized that the bar had a tendency to spin as Quil was swinging which would cause him to fall if he didn’t have a super tight grip. To remedy this, Andrew drilled a hole in the dowel and put a peg into the hole. He then drilled a hole for this peg to rest in the bottom of the open-ended brace, as seen in the photo below. This keeps the dowel from moving around within the hardware.
A few things to note if you decide to try this yourself. Make sure you use a dowel rod that is not too thick for your child’s grip, but is still strong enough to hold their weight. You want them to be able to hold it comfortably, but still need it to be strong. We only recommend doing this in a narrow-ish hallway. If the distance is too far apart, it might put too much strain and cause your dowel to break.
xo,
c.

While we’re waiting, waiting, waiting for Baby Girl to arrive, I’ve been doing what is normal for anyone who is mega-preggers – taking on huge projects that are made infinitely more difficult by my huge belly and constant body pains. That’s normal, right? Right?!

So, my current obsession and project in the works: crocheted rag rugs! We’ve been in the process of fixing up the kids’ room – which I hope to post about soon – and one of the rugs we have in their room is just too big, in my opinion. So, of course, I decided to make a new one. You know, before the baby comes. Ha!

I was trolling Ravelry (if you are a knitter or crocheter and aren’t on Ravelry, do yourself a favor and check it out now!) and came across this amazing crocheted Calico Rag Rug by Gillian Hamilton which inspired me to give it a shot. I did a little more research and also came across King Soleil which has a whole page dedicated to her process of creating rag rugs and tips and tricks she’s learned through her experience. She mainly uses upcycled materials, which really appeals to me since the amount of material it takes to make one rug can get pricey. I’m thinking a thrift store run is in order!

However, this current one that I’m working on (pictured above) is made from muslin that I purchased at the local fabric store. Basically all you have to do is find any sort of woven material you want, cut it into long strips and start crocheting in a circle and, Voila! you have a rug!

So far my rug is about 2 feet in diameter and there are few things I’ve learned:

l. Crocheting on a large scale is a workout. Think less wrist movement and more entire arm movement. Multiple times I’ve had to ask Andrew, “Is it hot in here?” Nope, just doing my crochet workout.

2. Working with such large pieces of fabric yarn requires the largest crochet hook I’ve ever seen. It’s obscenely large and slightly embarrassing. The hook I’m using for this particular rug is a 15mm – Q hook.

3. I’m a pretty experienced crocheter and I still had some problems with the rug getting wonky and wavy. I’m still not exactly sure why this was happening but with some minor adjusting I was able to straighten it out and it seems to be back on track.

I will post more pictures when the rug is done, which hopefully will be sooner than later.

-c.

via UrbanHomestead

How awesome is that photo?!

The garden this year has officially gotten out of hand. Sad to say, but we just couldn’t keep up with the abundance of weeds. I don’t mind weeding, really. Andrew hates it which is completely understandable. The best way to keep them down is to make time every day to go out and pull those suckers out. And the one thing we are short on is time. And Quil isn’t quite at that point where he can run free in the garden. He’s as bad as the damn deer! He just walks all over everything and pulls unripened veggies off the vine, grabs lettuce greens by the handful. He also likes to put rocks in his mouth and eat dirt. Typical!

Both Andrew and I know that having a garden requires a lot of commitment and effort, especially if you want to do it right. My dad is a great example of this. He is out in his garden every single day, rain or shine. Right now, that just isn’t feasible for us. So, Andrew and I have decided that instead of spending our time fighting weeds and feeling bad about our neglected patch of earth, that we are going to be smart about this and create something that works for us and or current situation. I am still holding out hope of having a modern homestead someday with sprawling vegetable gardens, fruit orchards and chickens. But until then, we’ve decided to build a modest greenhouse where we can grow the stuff we eat all the time, all year round.

We’ve been doing research and I wanted to share some of the inspirational images I’ve found.

via CSGD

via HGTV

via Alm Farms

via SinaEnglish

via Pinkpollyanna

via Apartment Therapy

via FlipFlipMeHeidi

I realize most of these are completely unrealistic. Don’t judge! They are truly just inspirational. I like the idea of doing something different, smart, and efficient.

We also realize that a greenhouse isn’t like a rotisserie, you can’t just set it and forget it! It will also require work but hopefully not as much weeding. Soooo, once we can carve out some extra time to build this bad boy, then we’ll be good. Right? RIGHT? Wish us luck!

-c.

Ever since we cleaned off our porch, baby boy has been hanging out there a lot. It’s baby/toddler proofed enough that he can be out there by himself and we don’t have to worry about him getting into trouble (other than eating the occasional ant, yuck!) Most of the time he just sits out there and watches cars pass while singing to himself. It’s quite sweet!

But anyway, lately he’s been coming inside and shutting the door behind him. Not completely shut, but enough that it’s hard for him to re-open without something to grasp. So instead of him having to come get us to re-open the door every time, we put a little drawer pull on the door within his reach so he can open it himself! So far, it’s been a success.

However, he can’t open the door if it’s locked or closed completely. So, he can only get out there if we open the door for him initially. Don’t worry. Q won’t be terrorizing the neighborhood. Plus, it’s a screened in porch with a locked screen door. Just to be safe ;)

Our baby boy is growing so independent! Yikes.

-c.

A couple weekends ago, I decided to finally address this little miserable patch of yard that is next to our porch steps. I’ve been meaning to for awhile, but other projects always seemed more important. But we didn’t have any pressing issues to deal with (like the damn deer) so I figured it was time!

The main issue with this little spot is the lack of sun. Most of the day it’s in the shade of a huge maple tree. We went to a local nursery and got some great advice from their perennial plant expert, Henry. It was so hard to choose, but this is what we went with:

A fun little mix of Hostas, Coral Bells, Solomon’s Seal, and Ferns! They will probably get totally crazy and outgrow this little space but then I can transplant them to other areas. Also, baby boy had so much fun helping prepare the area. He probably ate 10 pounds of dirt, but it really was sweet seeing him get so excited about digging in the dirt!

Anyone else have any fun gardening projects in the works??
-c.

Everyone knows that the Midwest is where awesome vintage goods are just hiding out waiting to be discovered by some big city folks looking for a diamond in the proverbial rough. Well, the Medina Antique Mall is one such place. Also known as AntiqueLandUSA, it’s so chock full of old shit it will make your head spin. Most of the inventory is stuff that I don’t have too much interest in, like ratty porcelain dolls with scary eyes, old baseball cards, and Victorian furniture. I mean, some of the stuff is really beautiful, just not my style.

However, we took a little trip there a couple weekends ago and found some real gems. There was one dude who had a booth full of mid-century Danish modern goods, hell yeah! As well as a few other choice pieces scattered here and there.

One draw back of this place (other than the fact that it’s super huge and overwhelming) is the fact that it’s mostly out of my price range. At this point in my life, I just can’t afford to spend $600 on a single side chair. No matter how awesomely designer-y cool it is. But it doesn’t cost anything to browse!

I didn’t bring my camera to the Antique Mall so I will resort to found images on the interweb. Here are just a sampling of the cool things I found:

1. Bertoia Side Chair by Harry Bertoia
2. Wassily Chair by Marcel Breur
3. Dansk Kobenstyle Cookware
4. Sprite Stacking Chair by Ross Lovegrove
5. Crayonne for Habitat Ice Bucket
6. Lucite Folding Chair
7. World Time Mantle Clock by Howard Miller
8. Herman Miller Eames Shell Chair
9. Italian Guzzini Arco Style Floor Lamp

Not all these items would be at home in our house, but I still enjoy them nonetheless, though Andrew wasn’t too keen on some of the things I pointed out. A couple times Andrew referred to the furniture as “looking like it belonged in Akeem’s Apartment”. For those of you who forgot the movie “Coming to America” let me jog your memory:

God, I wish that image was bigger. But don’t worry, our house looks NOTHING like that.

-c.